
Now that the editor seems to be functioning, I’m attempting to follow a tutorial for a 2D Platformer game, from the official documentation: https://fyrox-book.github.io/tutorials/platformer/part1.html.
Similar to Step 1, the process starts by navigating to the Rust projects directory and creating the game project, then launching the editor:
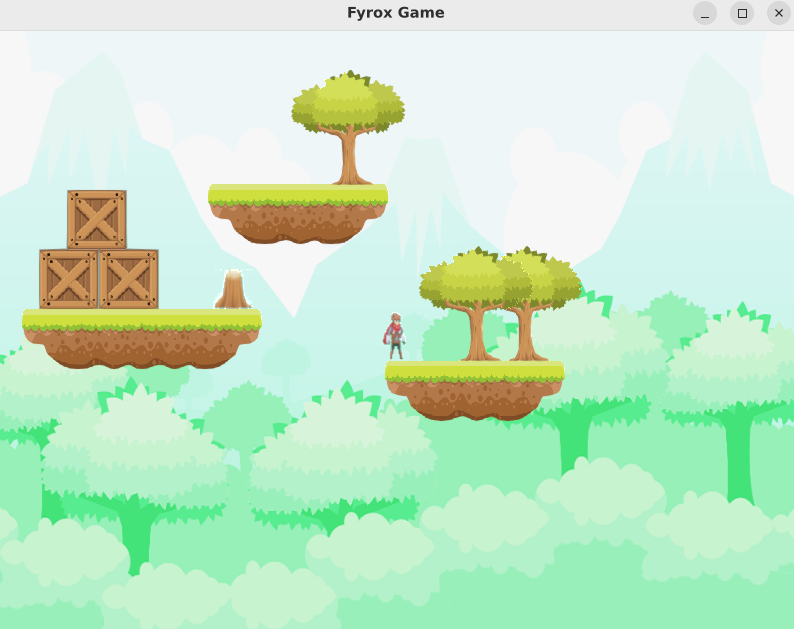
cd RustProjectsfyrox-template init --name platformer --style 2dcd platformercargo run --package editor --releaseInitial tasks involve defining and positioning game elements, there is no use of Rust yet:
- Download the graphic assets and place them in a « data » directory within the « platformer » folder.
- Clear the default scene, removing the Sprite2D and the camera, and switch to « 2D » mode.
- For the platforms, add a RigidBody component (__ROOT__ / Create child / Physics 2D / Rigid Body) with Body type = static, to which we add a Collider (Rigid Body / Create child / Physics 2D / Collider) and a Sprite 2D (Rigid Body / Create child / 2D / Rectangle) with Texture = drawing of ground (tiles/14.png in the assets folder); make a copy of the component and change the texture to have the left part (13.png) and the right part (15.png) for the platform.
- For decorations (no collision), add Sprite 2D elements (__ROOT__ / Create child / 2D / Rectangle) with textures for trees, stump…
- For mobile objects, add a RigidBody with Body type as dynamic, and add Collider, Sprite 2D, and texture (e.g., crates).
- For the player character, add a RigidBody, a Capsule-shaped Collider, and a Sprite 2D with Texture = data/characters/adventurer/adventurer-Sheet.png and uv rect -> Position = (0.0, 0.0), Size = (0.143, 0.091) in order to see only one picture.
- Add a Camera to the player’s RigidBody, set the skybox to “some”, define data/background/BG.png in the Front field for the skybox, use Orthographic Projection, and set Z far to 20,000.
Save the scene and launch the game for visualizing the graphics (to be exact, it is just the visualization of the graphic assets for now!):
To conclude this setup stage, the tutorial provides code to copy into a Rust file (game/src/lib.rs).
-> I open the file with VS Code and copy the given piece of coding… without understanding it for now!
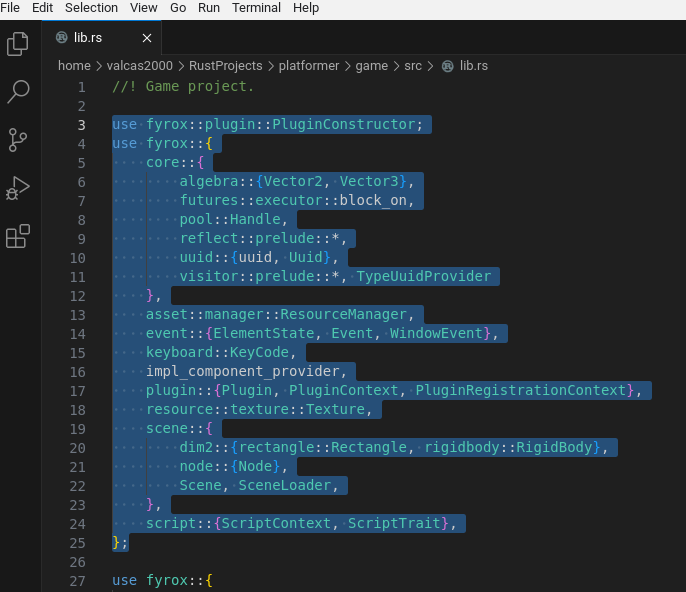
So, the next step involves understanding this code!
We are now diving into more complex aspects of Rust coding…
No responses yet